|
|
Since we now have many small pieces spread over several layers, we can choose one and one layer by clicking on it in the layer palette, click on the Move Tool in the toolbox and move around the piece in the layer with the mouse. Slightly fun, maybe - but we'll do more.
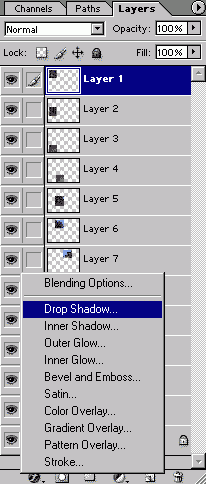
At the bottom of the layer palette, click on the Layer Styles (looks like a small 'f') and we get a menu, from which we choose Drop Shadow...
Alternatively, we can find the same options in the menu Layer > Layer Styles. All the options at the bottom of the layer palette can be found in the layer menu.
Now the real fun begin!
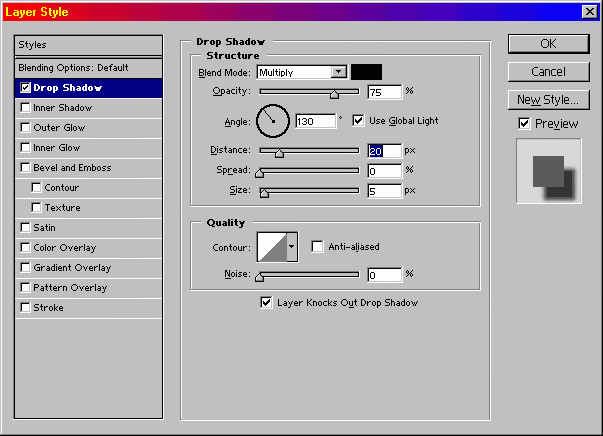
Here we've got the options for Drop Shadow. As we can see, we've got a lot of options to play around with:
There are a few more options - you just have to try them to see the effects you can get. You will achieve anything from very realistic shadows, to the totally wild effects.
But we take yet another step. We can use drop shadow on every layer, and move them around - but it will look very stiff and lined up; all straight lines. Wouldn't it be fun to rotate some of the pieces, making our picture more lively?
I think so. Select Edit > Free Transform (Ctrl-T) and you'll get a frame with eight handle points around the piece in the active layer. Move your pointer to just outside one of the corners, and it will take the shape of two curved arrows poointing along the sides. Click the lefte mouse button, and while holding it down, move it the way you want to rotate the piece. Press ENTER when you're satisfied.
When we've made the shadows, moved and rotated the pieces, we're left with a whole picture where the pieces don't line up to make a perfect image, but there's more life in it than the original.
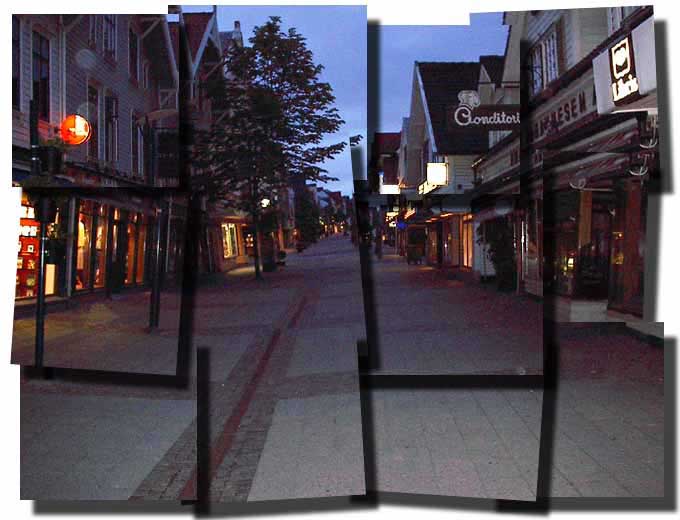
A brighter motive and some less shadow probably would have given us a more convincing result - but that's something you're able to do something about now.
What's left now, is to choose Flatten Image from either the popup menu from the triangle in the layer palette, or from the Layer menu. Then you save the picture, using Save As... so that you don't lose the original picture by saving over it.
![]()
![]()