Buy a daylight bulb

That’s what he said, our art teacher in class. Or at least strongly suggested it. There is a good reason for this, of course. Staying inside while painting isn’t particularly unusual, and it comes a no surprise that the sunlight is different from the artificial light indoors. The normal light bulbs emit a yellowish light, while the sun – the daylight – doesn’t.

So what – is it that dangerous? Why does it matter? Well, the reason is easy: Colours!

We want to have the correct colours for our motives when we paint – and the colours we see are the colours of the light reflected. When we mix our colours to paint with, we want them to be correct and represent what we actually see. This is where the artificial light can cause a problem; a yellow-tinted light is what we’re used to inside, but it will also fool us. When we mix colours, we will compensate for that yellow tint, which appears to be mixed in with the rest of the colours.

The result might look fine until we see the painting in daylight. Then the colours will be obviously wrong, and the painting doesn’t look good. Not fun.

Won’t the problem be the same, just opposite, if you paint in daylight, and then see the finished painting in the light from normal light bulbs? Nope. The light from the sun isn’t tinted with any colour, and thus there’s no colour to compensate for. And of course, that again means the colours are the correct ones, even when inside.

Sure, a tinted light inside will still affect the colours we see, but we’re used to it, and our eyes automatically adjust for it without we really noticing it. To compare what we actually see, we can use a camera. Cameras are quite stupid – we have to tell them what kind of light it is, be it outside in the sunshine, or overcast, or inside with normal light bulbs, and some other options. Then we can, for example, in a room with normal light bulbs tell the camera that it’s outside in the sunshine, and take a picture. Then we tell the camera that the light source is light bulbs, and take another picture of the same motive. The camera should then adjust its settings to compensate for the tinted light. Then we can compare the two pictures and see the differences in colour.

So, what did I do? I found what I needed, of course. It’s not just a daylight bulb, I can change both the intensity and temperature, so it can simulate sunshine, overcast, evening, plus of course the normal warm light bulb colour. And I can control it from the phone.

Quite smart.

And I could immediately see the difference by switching between daylight mode and normal mode. And it was quite a difference, too. It will be nice to paint “in the sunshine” rather than that warm light after this. 😉

Working with models

It’s not uncommon for painters to paint after live models, be it people or still life. As expected, this isn’t quite the same as painting after a photo; in the latter, you have the option to divide the photo up in lesser squares to make it easier to place correctly on the canvas. This is of course rather difficult with a live motive.

However, there is, of course, another way to paint a model. Yes, I know bodypaint is an option, but that’s not what I’m thinking of now. I’m thinking of something more complicated. A way where you really have to work with your models before even thinking about painting them.

It’s when you first make the models. From the ground up. and then paint them. Well OK, I know you can buy finished models, too, to paint, but this time it’s about the modelling act. Making models out of clay.

Years ago – or decades ago really – I bought some air drying clay. I never got any further with it than repairing the toe of a chicken-figure, but I kept the clay, airtight so it stayed soft. This was what I was looking for when I found the Folk Art acrylic paint mentioned in an earlier post. But why would I look for this? Am I tired of painting, wanting to sculpt instead? Nope. Not at all.

However, I got curious again, after having watched several videos by Ace Of Clay on YouTube: Where is that clay of mine? Do I still have it? Honestly, I don’t know. It might hide somewhere, or it might’ve been thrown away. No matter what, it doesn’t matter.

This isn’t because I lost interest in the topic, far from it. It’s still fascinating to see the figures made, and also dioramas, houses and more, be it from air drying clay or baking clay. And while I won’t give up painting, I have made some purchases …

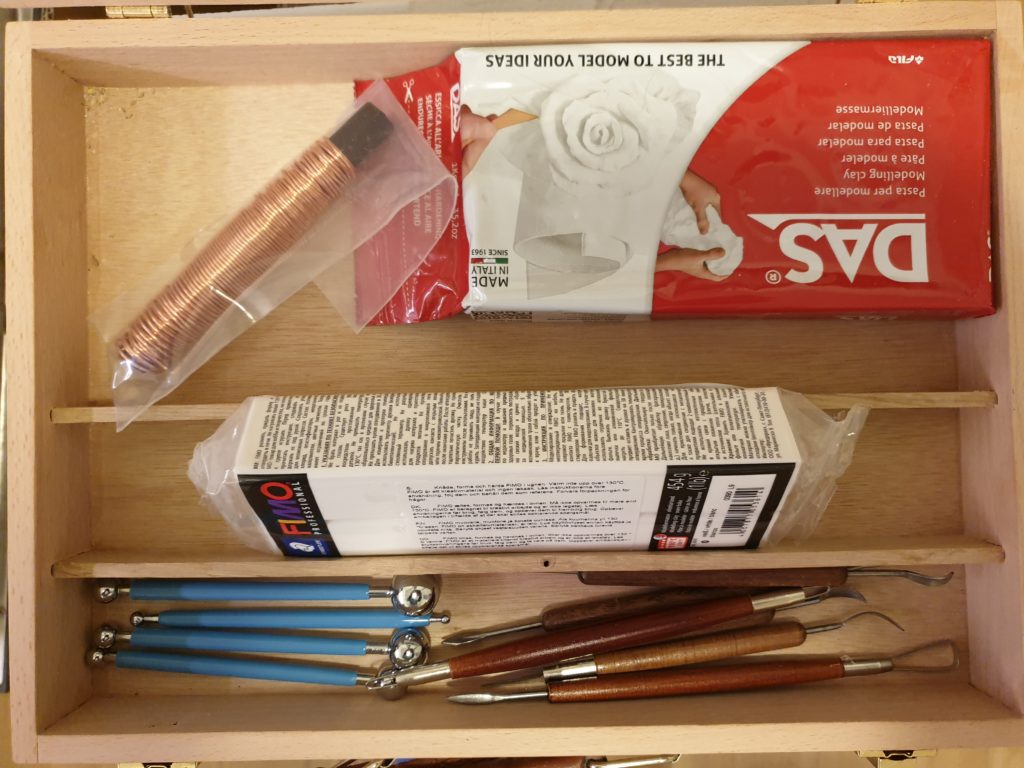
Air drying clay, polymer clay, copper wire, and tools. I’ve got it!

The first purchase was the DAS air drying clay. An impulse-buy after I saw it in the shop. Then I needed some tools, of course, so I ordered the first set. This was a toolset to cut and mark the clay – but I noticed that pressing cavities in the clay was occurring often – so another set of tools were ordered.

Also, was air drying clay the best for making figurines? Maybe not… But at this point, I had already bought a package of baking clay. Professional, even, which should be extra good for that kind of work. I also bought some copper wire that can be used for armature and a roll of aluminium foil. This can be shaped roughly into the form of the figurines – the models – so that I don’t use as much of the expensive clay. I only need to use a thin layer.

Do I need more now, to start modelling? Probably not, not equipment, at least. Even if a pasta maker seems to be a favourite tool, as it makes it easier to knead and work with the clay. But what I need most, is the time to sit down with it. Currently, I prioritize the painting on canvas. I’m still learning there, and need to spend time on it to become more confident and faster.

A modelling career will have to wait a bit longer – but this time I don’t intend to forget it for decades 😉